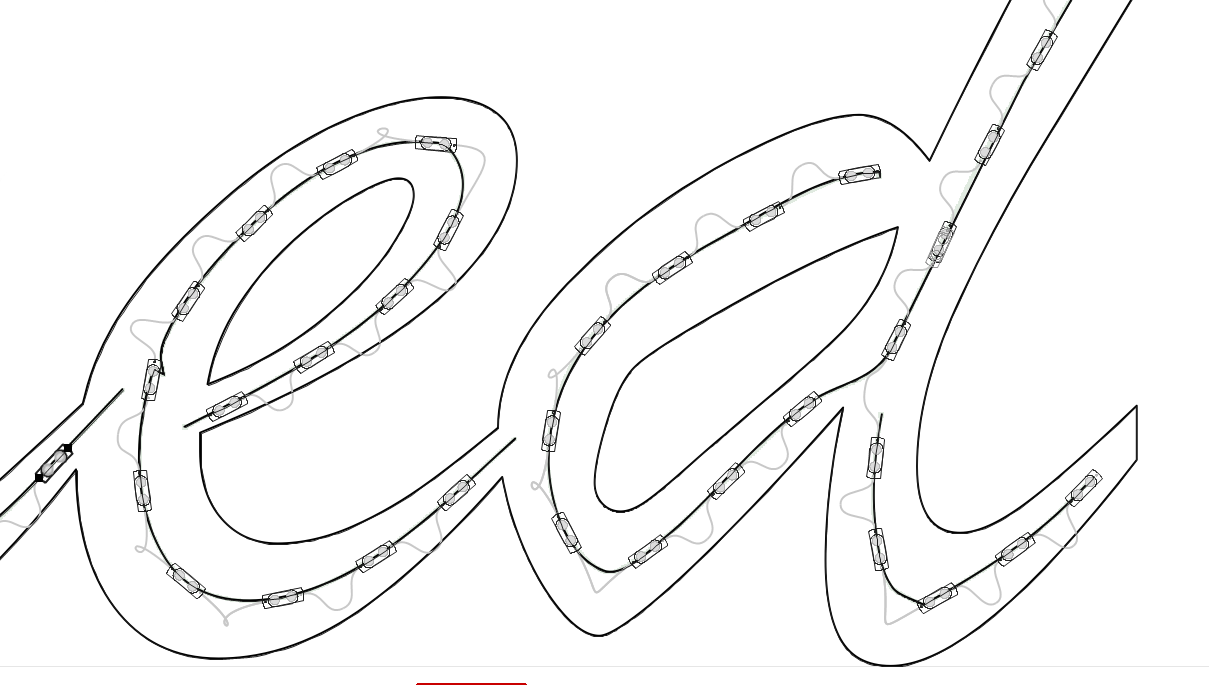
In addition to the Auto Populate Tools, LED Wizard 8 also has a "semi-automatic" way to lay out modules in PowerFlow. This gives you a little bit more control of the population process.
When you have a letter or line of text selected and then you go into PowerFlow, the guide paths will automatically display. These guide paths will be based on the artwork and the module you have selected.
If you then move the mouse over the guide paths, you'll see that there is a "preview" module that slides along the path. If you click and drag the mouse along this path, it will create a run of modules when you release the mouse. The mouse position will snap to the path, so you don't have to be perfect in moving the mouse.
In basiscally the same way, you can add single modules just by positioning the mouse and clicking once. This would enable you to manually space the modules along the path. Just don't create red wires unless it is an intentional splice!
In either of these approaches, you can also move off the guide path by holding the CTRL key as you move the mouse. In some cases, this is why you would choose the semi-automatic approach in the first place - because you want to deviate from the guide path.
A common scenario here is that you might want to route the modules differently through a welded script font. Or perhaps a complex logo is not easily automatically populated. Whatever the case the semi-automatic approach gives you full control.

Here in this example, the vertical run on the "d" is routed to the run going down to the left, but you can click and drag so it goes down to the right instead. To update the vector guide path, you would click on Update Vector GP in the PowerFlow tab.
 LED Wizard 8 Documentation
 LED Wizard 8 Documentation