Intro to LED Wizard 8 Docs
Getting Started
System Requirements
Installation
Screen Layout
LED Wizard Basics
Basic Workflow
Operating Modes
Defaults and Preferences
New in Version 8
Data Clean Up Tool
Module Filtering
LED Wizard Fonts
LED Wizard 8 Database
Population Scaling Tool
Graphical Population Scaling
Auto Stats and Title Block Merging
Auto Power Supply Loading
Auto Dimensioning
Single Run Populations
Create Guide Paths from Open Vector Paths
Freehand Drawing Tool
Power Supply Colors
New Auto Power Supply Loading Options
Multiple Document Interface
Power Supply Rotation
Population Library
Core Series Flexible Mode
Creating LED Module Layouts
Using the PowerFlow Tool
Creating and Editing LED Modules
Scaling LED Graphics
Working with Guidepaths
Working with Selections
Editing Existing Selections
Cabinet Layouts
Parallel Layouts
Module Rotations
Reusing Module Layouts
Target Density
LED Property Bar
Using Power Supplies
Using Title Blocks
Multiple Module Title Blocks
Title Block Variables
Using Guidelines
Copy and Paste
Importing Files
From Adobe Illustrator
From Corel Draw
From AutoCAD
Exporting Files
Editing Text
Zooming
Vector Editing
Loop Editing
Tools, Tabs and Property Bars
PowerFlow
PowerFlow Tool
PowerFlow Property Bar
PowerFlow Tab
PowerFlow Tool Keyboard Shortcuts
Semi-Automatic Populations
Layout Tool
Data Clean Up Tool
Auto Mounting Holes Tool
Assign Letters Tool
Scale Tab
Summary Tab
PS Tab
Objects Tab
Layers Tab
History Tab
Job Tab
Text Edit Tool
Vector Edit Tool
Keys for Vector Editing
Loop Edit Tool
On Screen Digitizing Tool
Object Property Bar
Group Property Bar
Guideline Property Bar
Measure Tool Property Bar
Bitmap Property Bar
LED Object Property Bar
Job Color Property Bar
Menu Reference
File Menu
New
Open
Open Recent
Save
Save As
Save Copy As
Close
Snapshots Menu
Import
Scan
Export
Export Scaled PDF
Email PDF
Email
Print
Exit
Edit Menu
Undo
Redo
Cut
Copy
Paste
Paste Special
Paste in Place
Delete
Duplicate
Select All
Vector/Node Tools
Vector - Insert
Vector - To Line
Vector - To Arc
Vector - To Bezier
Vector - Break Loop
Vector - Set St/End Point
Vector - Join St/End Point
Vector - Move Opening
Vector - Add Vertical Guide
Vector - Add Horizontal Guide
Reorder Loops
Unexplode Vector Paths
Purge Undo/History
Document Properties
View Menu
Zoom commands
Toolbox menu
Custom Toolbars
Refresh
Show Fill Colors
Show Stroke Colors
Show Grid
Show Guidelines
Show Rulers
Show Loop Direction
Show Job Color Palette
Show Side Bar
Show Info Bar
Show Help Bar
Show Group Member Names
Highlight Small Vectors
Transparent Background
Reset Toolbar Layout
Layout Menu
Layers
Guides commands
Shapes commands
Rounded Rectangle
Polygon
Arrow
Layout Properties
Size to Fit
Show Layout Size
Snap to Grid
Snap to Guidelines
Snap Dimensions to Graphics
Selectable Guidelines
Auto Square
Create Auto Dimensions
Arrange Menu
Align Tools
Distribute Tools
Group Tools
Locked
Editable
Select Only by Edge Click
Allow Options
Break Into Loops
Break Into Outer Loops
Combine
Close All Loops
Remove All Inner Loops
Horizontal Mirror
Vertical Mirror
Z Order Tools
Move to Layer
To Top
To Bottom
Move One Up
Move One Down
Text Menu
Text Tool
Break Apart
Live Spell Checking
Convert to Text
Change Copy
Change Case Tools
Font Wizard
Font Layout
Vertical
Add Variable Text
Edit Variable Text
Remove Variable Text
Image Menu
Vectorize
Crop Tool
Rasterize
Rotate +/- 90 Degrees
Flip Horizontal/Vertical
Invert
Commit Rotation
1:1 Zoom
Save (Image) As
Cut at Max Length
Reorder Tubes
Power Supply Template Setup
Multi Excel Update
LED Menu
PowerFlow LED Tool
Assign Letters
Statistics Menu
Update Statistics
Update Grouped Statistics
Recreate Statistics
Respace Stats
Uniformly Respace Stats
Merge Title Block Template
Remove Title Block
This Document is a Title Block
Optimized Title Block Text
Create Module Hole Layer
Create Router Layer
Auto Mounting Holes Tool
Update Vector Guidepaths
Remove Vector Guidepaths
Create Guide Paths from Open Vector Paths
Recreate with Bezier Curves
Rasterize-Vectorize Filter
Remove LED Modules
Populate Menu
Populate
Populate All
Repopulate
Populate Along Guide
Populate Stroke Inline
Populate Single Horizontal Serif
Paste Selected Runs
Insert Parallel Guide Line
Add to Population Library
Respace Selected Runs
Auto Respace
Auto Join
Filtering Enabled
Calculate Stroke Width at Cursor
Modify Menu
Select All Modules in Run
Select All Modules in Letter
Select Stroke
Add Run to Selection
Rotate Menu
Reset Primary Rotation Angle
Reset Secondary Rotation Angle
Alternate Rotations
Rotate 90 degrees
Rotate 45 degrees
Rotate 45 degrees - Alternating
Rotate Counter-Clockwise (Left)
Rotate Clockwise (Right)
Flip Primary Rotation Angle
Flip Secondary Rotation Angle
Convert to Perpendicular Alternate Rotated
Density Menu
Increase Density
Increase Density For Entire Run
Decrease Density
Decrease Density For Entire Run
Uniform Spacing
Uniform Spacing For Entire Run
Add / Remove Density Segment
Show Density Segments
Clear All Density Segments
Append Module
Insert Single Module
Mirror Horizontal
Mirror Vertical
Fill To Cursor
Break Run
Move Opening
Convert To Line
Shift Menu
Shift Inward
Shift Outward
Slide Backward
Slide Forward
Slide to Max Spacing
Reconnect Runs
Center in Stroke
Center in Stroke w/Cleaning
Mouse Menu
Nudge
Nudge Faster
Delete Current Run
Delete Module(s)
Delete Module(s) and Break
Delete All Modules in Current Letter
Delete Modules in All Letters
Remove Overlapping Modules
PowerFlow Measure Mode
Ensure Reachability
Change All Modules
PS Menu
Power Supply Edit Mode
Add Selection Rectangle Modules to Power Supply
Connect Run to Power Supply
Remove Run from Power Supply
Add New Power Supply
Remove Power Supply
Add One Power Supply per Letter
Add One Power Supply per Letter (Auto Select PS)
Add One Power Supply for All Letters
Add One Power Supply for All Letters (Auto Select PS)
Add Optimal Power Supplies by Letter
Add Optimal Power Supplies by Run
Add Optimal Power Supplies by Modules (breaks runs)
Connect Current Letter to Power Supply
Remove Current Letter from Power Supply
Drawing Left
Drawing Above
Drawing Right
Drawing Below
Next Drawing Position
Hide Power Supplies
Arrange Power Supplies in a Grid
Options Menu
Show Connecting Wires
Show Run Numbers
Show Power Supply Wires
Show Power Supply Data Boxes
Show Power Supply Data Box Borders
Show Module Drawings
Show Letters and Stats
Show Vector Guidepaths
Show Stroke Width Line
Enable Dynamic Repop
Power Supply Color Mode
Auto Extend
Remove All Stray Modules
Refresh Run Numbers
PowerFlow Menu
Ctrl Enables Snapping
Non-Snapping Movement Auto Rotates
Non-Snapping Drag Auto Rotates
Show Stroke Circle
Excel Menu
LED Excel Link Setup
Update Excel
Reconnect
Auto Update Excel
Excel Enabled
Title Block Setup
Letter Statistics Setup
Legacy Statistics Template Setup
Power Supply Template Setup
Power Supply Pricing Setup
Module Pricing Setup
Filter Modules
Edit Face Materials
Legacy Letter Statistics Mode
Open Merged Titleblock File
Upload Log Files
Tools Menu
Options
General Tab
View Tab
Edit Tab
Save Tab
Text Tab
LED Tab
Tools Tab
Directories
Keyboard
High Color Toolbox
Switches
Update LED Database
Reload LED Database
Outline
Weld
Layout Tool
Vector Edit Tool
Loop Edit Tool
On Screen Digitize Tool
Freehand Drawing Tool
Data Prep Tool
Dimensions
Measure
Calculate Area
Channel Letter Return
Radius Corners
Convert Menu
Convert Beziers to Arcs
Convert Arcs to Beziers
Convert to All Lines
Convert Lines to Arcs
Convert Flat Blend to Simple Fills
Convert All Clippings Paths to Normal Paths
Convert All Clipping Paths to Normal Filled Paths
Detect Letters
Remove Coincident Loops Across Layout
Remove All Clipping Paths
Optimize Vectors
Find Self-Intersecting Loops
Force Loop Direction
Remove Duplicate Loops
Display Path Length
Reset Windows Explorer File Association
Open AppData Folder
Window Menu
Cascade
Tile Vertical
Tile Horizontal
[Documents]
Help Menu
Get Help
Login
Check for Web Updates
About LED Wizard
Misc
DXF Options
PDF Options
Shortcut Key Reference
Working with App Data Files
Previous  Next

8.7 Image Menu


Vectorize

Vectorizing is the process of converting bitmap images to vector artwork, also called "Raster to Vector Conversion."

In order to create an LED layout, LED Wizard prefers vector artwork. This section discusses the Vectorize Tool, but also see the Freehand Drawing Tool and On Screen Digitizing Tool as additional options. The Freehand Drawing Tool can be used to draw a path of LED modules on a blank screen or on top of a bitmap object, so it is no longer a requirement that there be vector artwork.

Before we discuss the specifics of the Vectorize tool, it's important to realize that not every bitmap file is suited to be vectorized. The best results will come from artwork that has "spot colors" and not blends, gradients, etc. A photograph of a sign to be retrofitted should be cropped to the sign itself to exclude any busy backgrounds.

First, select the bitmap that you want to Vectorize and then click on the Vectorize icon or select Vectorize from the Image Menu.

The Vectorize property bar will be displayed along the top of the screen:

Before you can vectorize, you often need to select the specific colors that exist in the bitmap image, which is called posterizing the image, which happens during the vectorizing process.

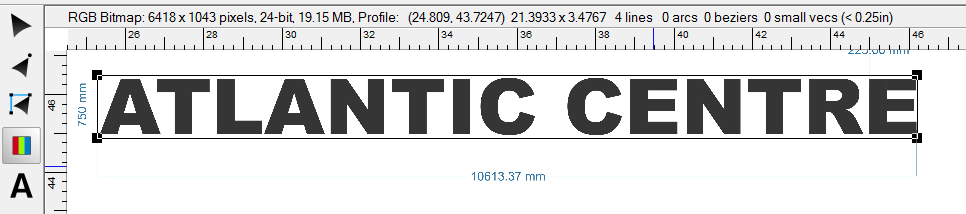
Simply click on the various colors in the bitmap image and they will appear in the color bar as shown above.

Here is a description of each field/option in the Vectorize property bar.

Smooth

This option will smooth the pixels for a better result.

Include Border

This option keeps any border from the original graphic. Using this option can result in a reversed color result.

Line Art

This option treats the image as a simple two color image.

CPE

This enables multiple color editing.

Transparency

This option lets you set how transparent the bitmap will be after vectorizing, so you can overlay the bitmap and vector graphics for final touch up editing. To be clear, after vectorizing, you will have both a bitmap and a vector object placed side by side.

Corners

This option enables detection of corners. Without this checked, you often get smoother results, but no sharp corrners.

Lines

This option will prevent any arcs or bezier curves from being created. You can then use other tools to convert to curves.

Bezier

This option will create bezier curves, which often match the original artwork much better than arcs.

(Tolerance drop down list)

This option works with the Bezier option, and determines how tight the tracking is. A smaller value will result in more Bezier curves that very closely track the original bitmap, while a larger value will result in fewer Bezier curves that may have some deviation from the original bitmap.

(Colors selected)

This shows colors currently selected from the bitmap image. While you are in the Vectorize tool, the cursor will change to an eye dropper graphic. Click on the colors from the bitmap that you want to vectorize and those colors will be added to the color indicator. Colors that are not added in this way will be skipped during the Vectorize process.

(Settings list)

This is the list of presets you can choose from. Select Settings to define more or edit the existing presets.

Settings

Click this button to bring up the Vectorize Settings dialog box.

Vectorize

Press this to proceed with Vectorizing.

The resulting vector graphic will be placed to the right of the original bitmap. Depending on the transparency setting you chose, this original bitmap may be grayed out, but should still be visible so that you can overlay the vector graphic to check for accuracy.

 
Crop Tool

The Crop command will let you define new boundaries for the selected bitmap.

When this tool starts, you can drag from each corner to change each edge, or you can hold down Shift to define a new rectangle.

The complete the crop, double click or press Enter.

 
Rasterize

This feature simply converts the selected vector graphic(s) into a bitmap image, using the selected resolution (DPI). It's a short cut for exporting to a bitmap and then importing it again.

It's also useful when a complex graphic using gradients or other effects takes up a lot of memory and makes printing many copies difficult or just slow. Converting to a bitmap with Rasterize can greatly ease the memory usage in these cases.

When deciding on the settings to use for Rasterize, consider the purpose of rasterizing and the eventual output size. If you are Rasterizing with the intent of then Vectorizing, use a DPI and/or Height/Width that gives you enough data to get good results. On a simple horizontal letter set, for example, this may be 1000 pixels for the Height.

DPI

This is the final DPI of the resulting bitmap. DPI is Dots per Inch. An image that is 10" tall by 8" wide at 300 DPI would then be 3000 pixels tall by 2400 pixels wide. Changing the DPI value will change with Width and Height values.

Width

This is the width in pixels of the resulting bitmap. Make sure this is least as big as you require but not much bigger.

Height

This is the height in pixels of the resulting bitmap. If you are Rasterizing a letter set that you then want to (Re)Vectorize, make the height at least 1000 pixels or larger.

Margin (%)

You may specify a margin to add from the edge of the bitmap.

Oversampling

This can be used to smooth the edges. In Anti-Alias mode this is not necessary.

Replace

This option replaces the original vector graphic or group with with the resulting bitmap. If you uncheck this option, you will end up with the original vector object and the new bitmap object.

Transparent

This is only available in Anti-Alias mode. It will allow the background to continue to show through, whereas normally the background is white.

Color Box

The small box next to the Done button is the background color to use. Click this area and then use the Color Tab to pick a new background color.

 
Rotate +/- 90 Degrees

Use this command to rotate the image left or right by 90 degrees.

 
Flip Horizontal/Vertical

Select these commands to flip the selected bitmap horizontally or vertically.

 
Invert

The Invert command will make an exact "negative" of the selected bitmap image. This is just like the film negatives, where all the colors are "opposite" of the real colors.

 
Commit Rotation

This command is helpful when you've rotated a large image and it's drawing slowly. This will rotate the image and create a new image, so that it doesn't have to be rotated every time it's drawn. If using 32-bit images and you've also extended or condensed the image, the area that's normally white will be transparent.

This operation will save a copy of the bitmap in the history, so it should be used with care if you have limited memory compared to the size of the bitmap.

 
1:1 Zoom

This command will set the zoom level so that the bitmap is displayed at exactly 1:1 zoom factor, where one pixel in the image is one pixel on the screen.

This is useful to understand the size/scale of a bitmap, especially relative to other objects in the layout.

 
Save (Image) As

Use this command to save the selected image to a file. This is a simplified export to a bitmap format, including TIFF, JPG, PCX, BMP, PSD, and PNG.

When the selected bitmap has a transparent alpha channel, and you want to preserve transparency, you must select "32" for Bits Per Pixel.


Previous  Next